You’ve almost certainly seen the shot: a race car or cyclist frozen in crisp detail while the entire background smears into long horizontal streaks of color. That’s panning — one of the most rewarding techniques in action photography. Where a fast shutter speed makes everything look static, panning communicates speed itself. The best part? You don’t need exotic gear. Just a camera with manual or shutter-priority control, a moving subject, and a little practice.
What Is Panning Photography?
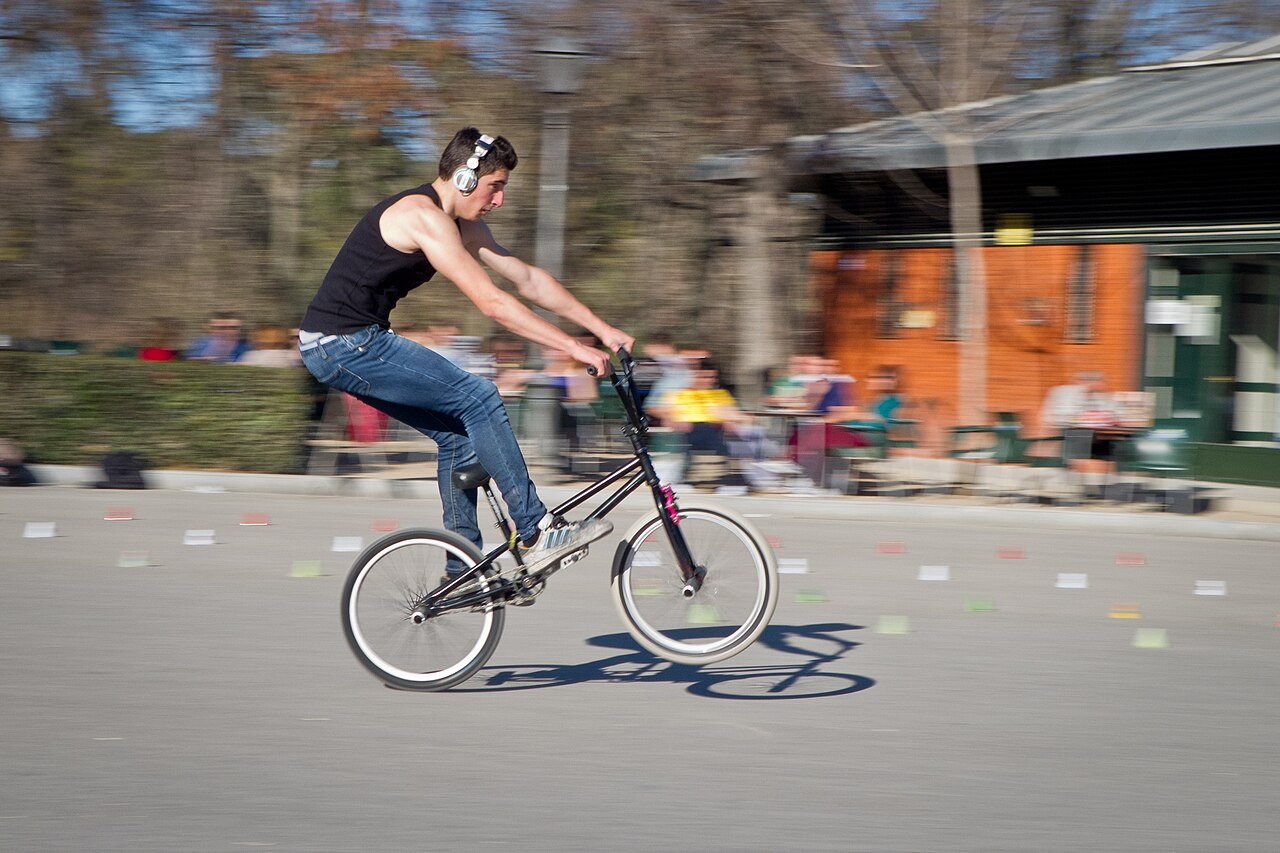
Panning is a technique where you deliberately use a relatively slow shutter speed while tracking a moving subject with your camera. Because the camera moves at the same rate as the subject, the subject stays in roughly the same position in the frame and comes out sharp — while the stationary background sweeps across the sensor during the exposure and blurs into smooth streaks. The result is a sharp subject against a blurred, motion-filled background, which is one of the strongest visual cues for speed there is.
How Panning Works
The effect comes down to relative motion. During a slow exposure, anything that moves across the frame gets blurred; anything that stays still relative to the sensor stays sharp. When you pan correctly, your subject isn’t “still” — you’re simply matching its motion, so the blur falls on the background instead. This is why panning is easiest with subjects moving parallel to your position: their distance stays roughly constant, so your panning speed stays constant too. A subject heading straight toward or away from you changes apparent speed and is much harder to track.
Camera Settings for Panning
Set your camera to Shutter Priority (Tv on Canon, S on most others) so you control the shutter speed and let the camera handle aperture and ISO. Then:
- Shutter speed: Start around 1/60s and adjust. Slow subjects need slower speeds, fast subjects faster ones. A useful starting range is 1/30s–1/125s for runners, cyclists, and street traffic, while fast cars or motorcycles often work best around 1/100s–1/250s. There’s no magic number — it depends on subject speed, your distance, and how blurred you want the background.
- Aperture: f/8–f/16 gives enough depth of field to keep the subject acceptably sharp while you’re tracking.
- ISO: Use Auto ISO, or lock it low (100–200) if the light allows. Slow shutter speeds let in lots of light, so low ISO is usually easy to hold.
- Focus mode: Continuous autofocus (AI Servo on Canon, AF-C on Sony/Nikon) tracks the subject as it moves. If autofocus struggles, pre-focus manually on the spot where the subject will pass and switch to manual focus.
- Drive mode: Shoot bursts. The keeper rate for panning is low even for pros, so a rapid sequence dramatically raises your odds of one perfect frame.
- Image stabilization: If your lens or body has a dedicated panning mode (Nikon’s VR “Sport” or Canon’s “Mode 2”), use it. Otherwise, turn IS off — stabilization can fight your pan and add its own artifacts.
The Panning Technique, Step by Step
- Pick the right position: Stand so the subject will cross in front of you moving roughly side to side, with a background that has visible detail — trees, fences, spectators, signage. A featureless sky or wall won’t show streaks no matter how well you pan.
- Plant your stance: Stand with feet shoulder-width, facing where the subject will pass. Rotate from your hips and torso, not just your arms — this keeps the motion smooth and level.
- Lock on early: Acquire the subject well before it reaches you and start tracking it before you press the shutter.
- Squeeze, don’t stab: Fire the shutter while you’re already moving, keeping the subject in the same spot of the viewfinder.
- Follow through: Keep panning after the shutter closes. Stopping early is the single most common mistake — it blurs the subject right at the end of the exposure.
Common Panning Mistakes (and How to Fix Them)
- Whole image is blurry: Your shutter is too slow for the subject’s speed, or your pan is jerky. Raise the shutter speed slightly and smooth out your rotation.
- No background blur: Shutter speed is too fast — slow it down, or move closer to a faster-moving subject.
- Subject blurred but background sharp: You’re not matching the subject’s speed. Keep it glued to the same point in the viewfinder.
- Streaks are curved or wobbly: You’re rotating from the wrists instead of the hips. Lock your upper body and pivot from your core.
Best Subjects to Practice On
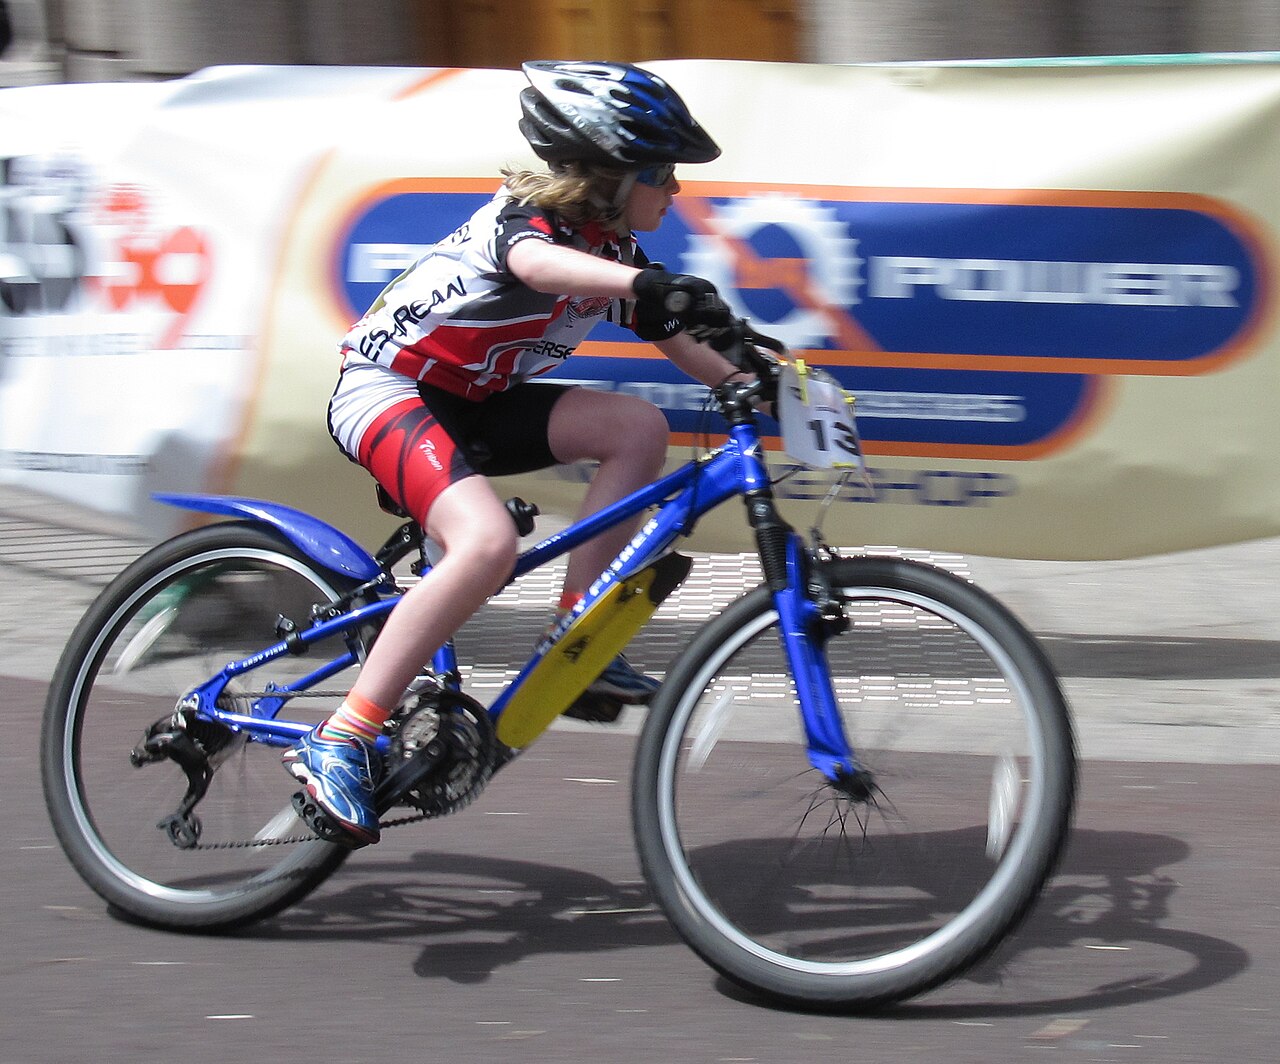
Start with predictable, medium-speed subjects before chasing race cars: cyclists and joggers on a straight path, buses and cars on a city street, even a friend riding a scooter back and forth. These repeat on a predictable line, letting you fine-tune shutter speed and technique without waiting hours between attempts. Once you can land a sharp cyclist at 1/60s, stepping up to motorcycles and race cars at 1/125s–1/200s will feel natural.
Gear That Makes Panning Easier
Panning is more about technique than equipment, but a couple of things genuinely help. A lens in the 70–200mm range gives you working distance and a flattering, compressed background. Modern mirrorless bodies like the Sony a7 IV or Canon EOS R6 II make the job easier thanks to reliable continuous autofocus and high burst rates, but any DSLR or mirrorless camera with shutter-priority mode will work. If your arms tire or your pan wanders, a monopod — or a tripod with a fluid video head — stabilizes the vertical axis while leaving you free to sweep horizontally.
Conclusion
Panning is the rare technique that’s both easy to understand and endlessly difficult to master — which is exactly what makes it so satisfying. Nail your settings, pivot from the hips, follow through, and shoot in bursts. Expect to delete a lot of frames, but keep the few where the subject is tack-sharp against a streaking background, and you’ll have images that actually feel like they’re moving.
Frequently Asked Questions
What shutter speed should I use for panning?
Start at 1/60s and adjust. Runners and cyclists often work at 1/30s–1/60s, while fast cars and motorcycles typically land between 1/100s and 1/250s. The faster the subject, the faster the shutter speed you can use while still blurring the background.
Does panning work with a phone camera?
Yes, within limits. Most phones lock focus and shutter speed automatically and lack real control over shutter duration, but you can still track a subject smoothly and get a partially blurred background — especially in lower light or with a “pro” mode that exposes a shutter control.
Why is my subject blurry even though I tracked it?
Usually because you stopped panning before the shutter closed, or your shutter speed was too slow for the subject’s speed. Follow through completely, and raise the shutter speed a notch if the subject is fast.
Do I need a tripod for panning?
No — handheld works fine, and many photographers find it the most natural. A monopod or fluid-head tripod can help smooth out vertical wobble, but proper hip rotation while handheld is enough for most subjects.
Related Posts

Portrait Lighting Patterns Explained: Rembrandt, Loop, Butterfly, and Split Lighting
Most people learning portrait photography obsess over camera settings, lenses,…
RAW vs JPEG: What’s the Difference and Which Should You Shoot?
Every digital camera gives you the same basic choice: shoot…
Understanding ISO in Photography: A Complete Beginner’s Guide
Exposure is the foundation of every photograph, and three settings…