Every photographer has taken a photo that came out too orange or too blue. The culprit is almost always white balance. Your eyes adjust to different lighting automatically, but your camera has to be told how to interpret the color of the light it sees. White balance is the setting that keeps whites white and colors true to life. In this guide we explain what white balance is, how the Kelvin scale works, and how to get accurate color in every shot.
What Is White Balance?
White balance (WB) is the camera setting that removes unrealistic color casts so objects that look white in person also render as white in your photo. Different light sources have different colors: candlelight glows warm orange, midday sun is close to neutral, and open shade can look distinctly blue. When the camera’s white balance matches the light source, every other color falls into place and skin tones look natural. When it is wrong, the whole image takes on a distracting yellow or blue tint.
Color Temperature and the Kelvin Scale
Color temperature measures the color of a light source in Kelvin (K). Lower values are warmer (more orange and red), while higher values are cooler (more blue). Common reference points photographers rely on include:
- Candlelight — about 2000K
- Tungsten / incandescent bulb — about 3200K
- Fluorescent light — about 4000K
- Midday daylight — about 5500K (the standard neutral reference)
- Overcast / cloudy sky — about 6000–6500K
- Open shade — about 7000K
- Deep blue sky — 10000K and above
Here is the counter-intuitive part: dialing in a higher Kelvin value makes the image look warmer, and a lower value makes it look cooler. That is because the camera compensates by adding the opposite color. Under warm tungsten light (3200K), if the camera is set to 5500K it assumes the light is neutral daylight and does not correct for the warmth — so the photo comes out very orange. The camera adds blue to counter warm light and adds orange to counter cool light.
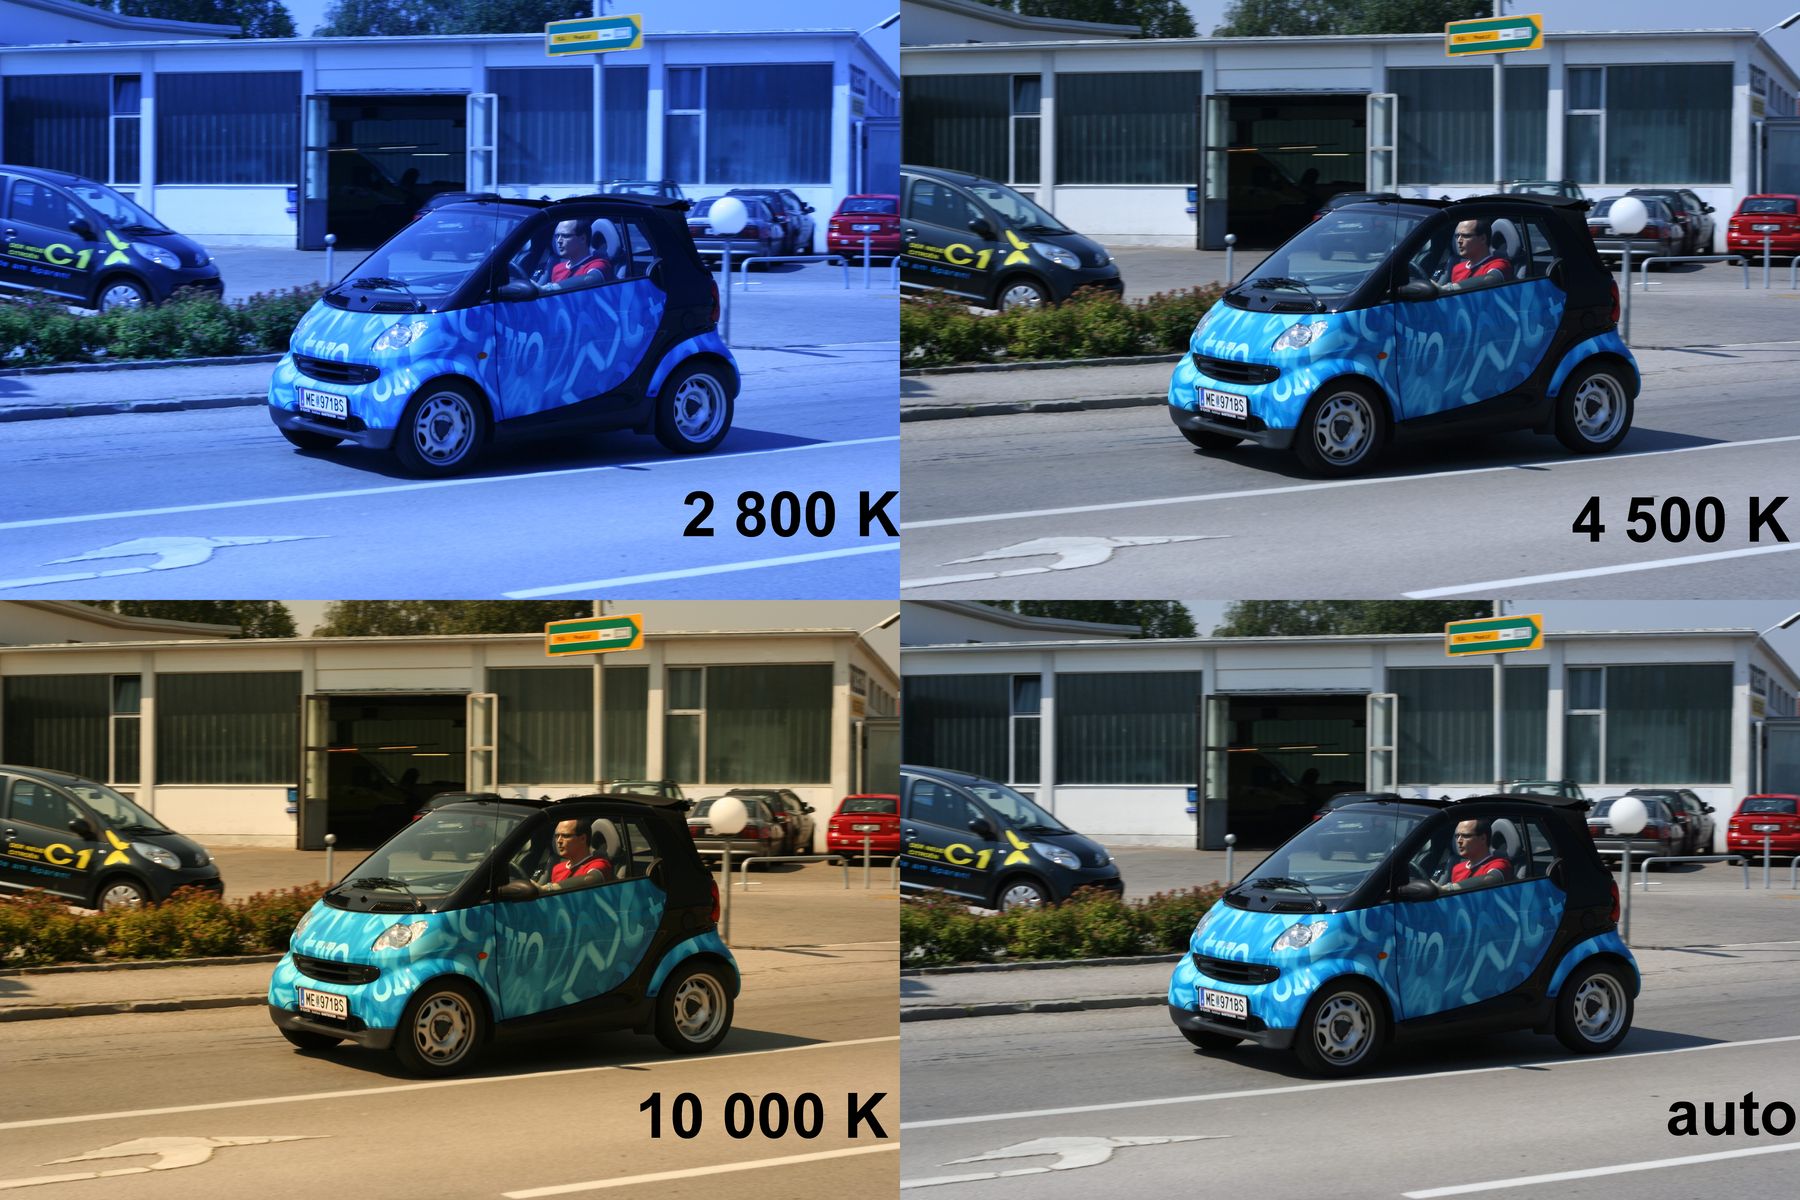
White Balance Presets Explained
Every camera offers a set of presets matched to common lighting situations. Choosing the one that matches your light is the fastest way to accurate color:
- Auto (AWB) — the camera analyzes the scene and chooses a temperature automatically.
- Daylight / Sun (~5200–5500K) — for shooting in direct sunlight on a clear day.
- Cloudy / Overcast (~6000K) — warms up the blue cast of a cloudy sky.
- Shade (~7000K) — strongly warms images shot in open shade.
- Tungsten / Incandescent (~3200K) — cools the orange cast of household bulbs.
- Fluorescent (~4000K) — neutralizes the green-blue cast of tube lighting.
- Flash (~5500–6000K) — matched to the near-daylight output of a strobe.
- Custom / Kelvin — set a precise temperature, or measure from a white card.
Auto, Custom, and Manual White Balance
Auto White Balance (AWB) lets the camera evaluate the scene and pick a temperature, usually within a range of roughly 3000K to 7000K. Modern AWB is remarkably good in mixed and changing light, and many professionals leave it on as their default. Its weakness is consistency: across a burst of shots the reading can drift slightly, and in scenes dominated by a single color — a red wall, a golden sunset — AWB may over-correct and strip out warmth you actually wanted to keep.
Custom white balance is the most reliable option in tricky light. You photograph a neutral white or grey card under the same lighting, and the camera uses that reading as its reference. Manual / Kelvin lets you enter an exact temperature, which is ideal in the studio when you know the rated color temperature of your lights. A grey card also keeps white balance consistent across a session.
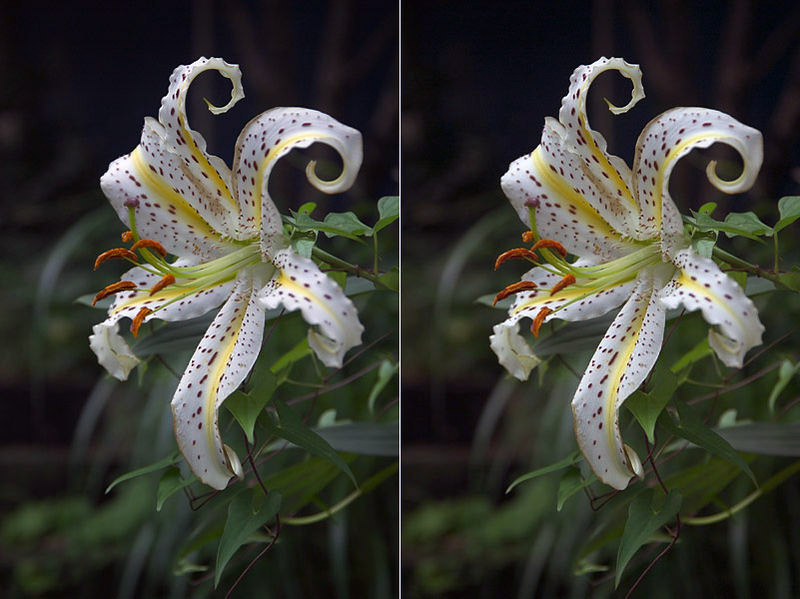
Shoot RAW to Fix White Balance Later
A JPEG bakes the white balance into the file the moment you press the shutter, so correcting it afterwards means degrading image quality. A RAW file stores the sensor data without a fixed white balance, which lets you adjust temperature and tint losslessly in editing software. That flexibility is a major reason to shoot RAW: fix white balance perfectly afterward, even if it was wrong in camera. If you shoot JPEG, take the extra second to set white balance correctly before you shoot.
White balance also has a second axis — the green-to-magenta tint — that most editors expose alongside temperature. It matters most under fluorescent and mixed lighting, where a temperature adjustment alone is not enough.
Conclusion
White balance is one of the easiest settings to understand and one of the fastest ways to improve the look of your photos. Match the preset to your light source, reach for a grey card in difficult conditions, and shoot RAW as your safety net. Get white balance right and your images will look cleaner, more natural, and more professional — starting with your very next shot.
FAQ
What white balance should I use for indoor photos?
Use the Tungsten / Incandescent preset (about 3200K) under warm household bulbs, or Fluorescent (about 4000K) under tube lighting. In mixed indoor light, Auto or a custom reading from a white card is the most dependable choice.
Is Auto White Balance good enough?
For most scenes, yes. Modern AWB is accurate in daylight and mixed light. It can struggle under strong single-color lighting such as street lamps or sunsets, where a preset or custom white balance is more reliable.
Can I fix white balance after taking the photo?
Yes — especially in RAW, where white balance is fully adjustable with no quality loss. JPEG allows small corrections, but large shifts visibly degrade the image.
Related Posts
Rule of Thirds and Leading Lines: Master the Two Most Important Composition Rules
Composition is what separates a snapshot from a photograph. A…
The Exposure Triangle: Aperture, Shutter Speed and ISO Explained
Every photograph you take is the result of one simple…
Focal Length and Perspective Explained: What Your Lens Really Does
What Is Focal Length? Technically, focal length is the distance…