Every photograph you take is the result of one simple decision: how much light reaches your camera’s sensor. Get too little and the image is dark and muddy (underexposed). Get too much and highlights blow out to pure white (overexposed). Three settings control this balance — aperture, shutter speed and ISO — and together they are known as the exposure triangle. Master how they interact and you move beyond auto mode, taking creative control of brightness, sharpness and mood in every shot.
What Is the Exposure Triangle?
The exposure triangle is a mental model photographers use to remember that the same “correct” exposure can be reached through many different combinations of three settings. Change one and you must compensate with at least one of the others to keep the brightness the same — a principle called reciprocity. The three corners are:
- Aperture — how wide the lens opens (controls light and depth of field).
- Shutter speed — how long the sensor is exposed to light (controls light and motion blur).
- ISO — how sensitive the sensor is to that light (controls light and image noise).
Each setting has a side effect beyond brightness, which is why exposure is as much a creative choice as a technical one.
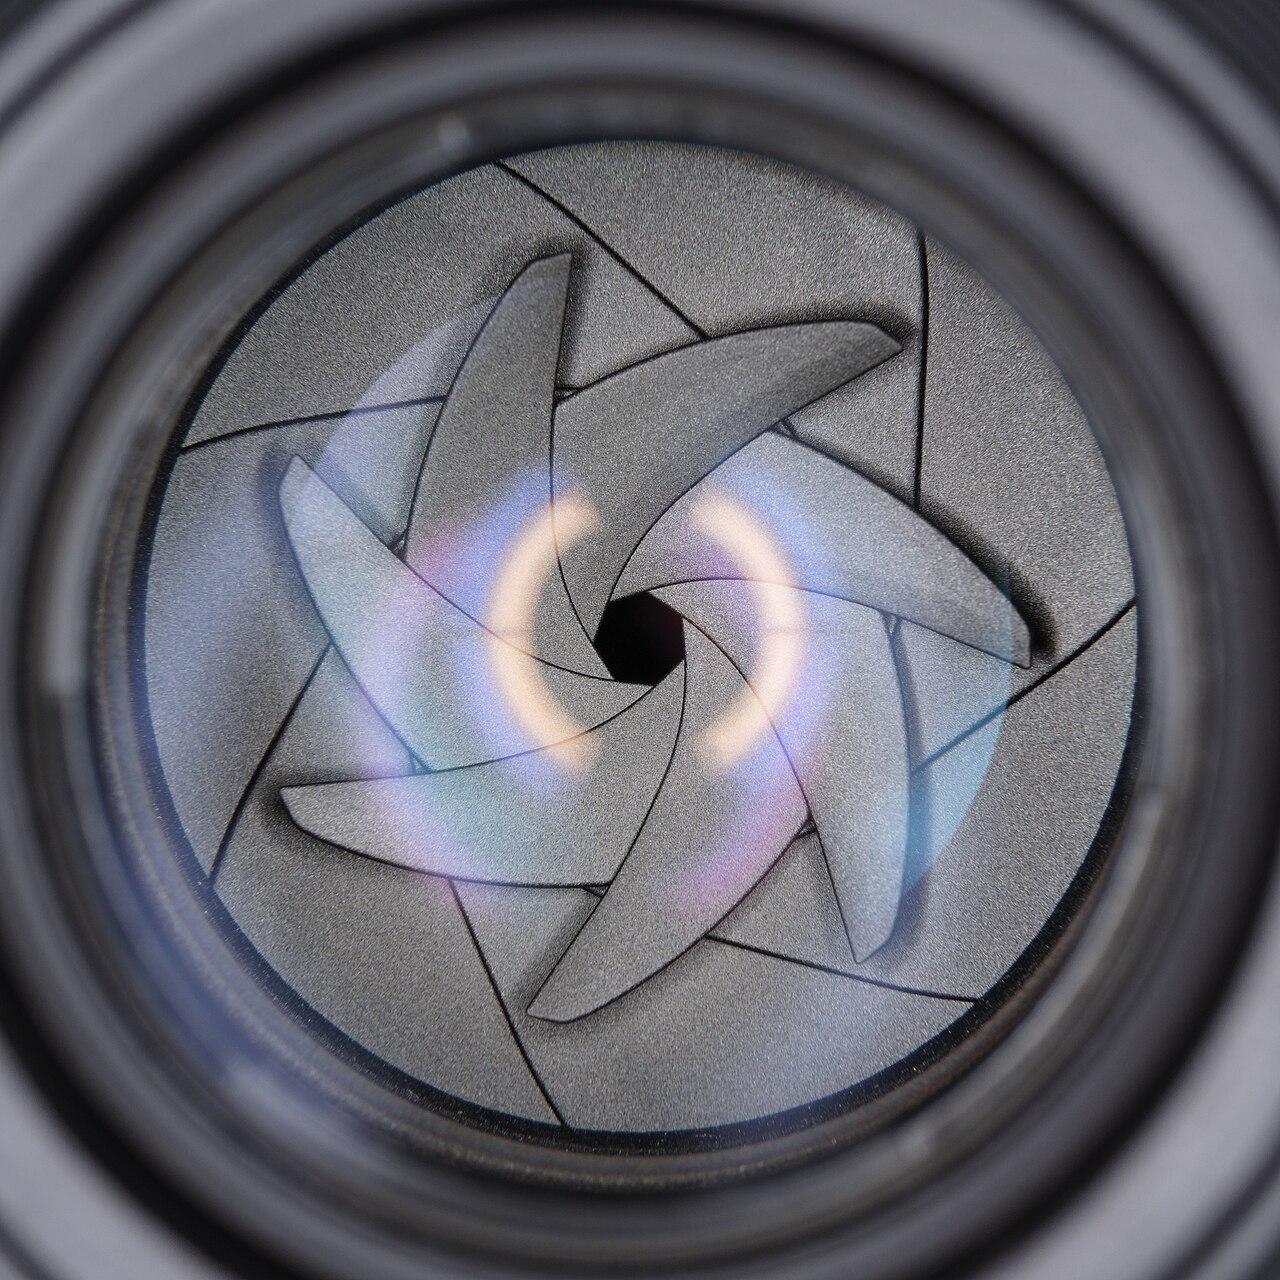
Aperture: Depth of Field and the F-Stop
Aperture is the opening in the lens, formed by a ring of blades, that lets light through. It is measured in f-stops such as f/1.4, f/2, f/2.8, f/4, f/5.6, f/8, f/11 and f/16. The counterintuitive part for beginners: a smaller f-number means a wider opening and therefore more light. Each full stop (for example, f/2.8 to f/4) halves the light entering the lens; going the other way doubles it.
Aperture’s creative side effect is depth of field. A wide aperture like f/1.8 produces a shallow depth of field, throwing the background into a soft, creamy blur — ideal for portraits where you want the subject to pop. A narrow aperture like f/11 keeps more of the scene in focus from foreground to background, which landscape photographers rely on to keep a whole vista sharp.
Shutter Speed: Freezing or Blurring Motion
Shutter speed is how long the camera’s sensor stays exposed to light, measured in fractions of a second (1/1000, 1/250, 1/60) or full seconds for long exposures. Doubling the exposure time doubles the light — a clean, predictable relationship.
The trade-off is motion. A fast shutter speed such as 1/1000s freezes a sprinter mid-stride or a bird in flight. A slow speed such as 1/30s lets moving subjects blur, and a multi-second exposure turns car headlights into ribbons of light or smooths a waterfall into silk. The practical rule of thumb: to hand-hold a shot without camera shake, use a shutter speed at least as fast as 1 divided by your focal length — so a 200mm lens needs roughly 1/200s or faster.
ISO: Brightness at the Cost of Noise
ISO controls the sensor’s gain — how strongly it amplifies the light signal it receives. A low ISO such as 100 produces the cleanest image with the least noise. Raising ISO to 800, 3200 or higher brightens the picture, which lets you shoot in dim conditions without a tripod, but it also amplifies the sensor’s random signal, producing digital noise — that grainy, speckled texture most visible in shadows and dark areas of the frame.
Because modern sensors handle high ISOs far better than their predecessors, the general advice is to keep ISO as low as possible for your scene, but not to be afraid to raise it when you need a faster shutter or a deeper depth of field. A sharp photo with a little noise is almost always better than a blurry, noise-free one.
Putting the Triangle Together
Imagine you are photographing a running dog in evening light and the image is too dark. You have three levers. You could widen the aperture (but the background will blur more), slow the shutter (but the dog will blur), or raise the ISO (but noise increases). The right choice depends on what matters for that shot: shutter speed for action, aperture for depth, ISO for light level.
Camera priority modes let you lean on one corner while the camera handles the rest. Aperture priority (A or Av) is the go-to for portraits and landscapes; you set the f-stop and the camera picks shutter speed and ISO. Shutter priority (S or Tv) suits sports and wildlife; you set the speed and the camera manages the rest. Full manual (M) gives you everything once the relationships feel natural.
Conclusion
The exposure triangle is the single most useful concept in photography because it connects the technical and the creative. Aperture, shutter speed and ISO each do two jobs at once: they control brightness and a signature image quality. Once you stop seeing them as three separate dials and start seeing them as one balancing act, you will know exactly which setting to reach for — and why — before you even raise the camera.
FAQ
What is the best ISO to use?
Use the lowest ISO that lets you achieve your required shutter speed and aperture — often ISO 100 in daylight. Raise it only when light is limited or you need a faster shutter, and accept a little extra noise as the trade-off.
Does aperture affect only depth of field?
No. Aperture also affects brightness and, at the extremes, overall sharpness. Very wide apertures can reduce corner sharpness, while very narrow ones can introduce diffraction, so most lenses are sharpest a few stops down from wide open.
Why do my photos look blurry even in bright light?
Blur usually comes from either camera shake (shutter speed too slow for hand-holding) or missed focus. Check your shutter speed against the focal-length rule of thumb first, and raise ISO or widen the aperture if it is too slow.
Related Posts
Focus Modes Explained: AF-S, AF-C and Manual Focus
Every time you half-press the shutter button, your camera has…
Metering Modes Explained: How Your Camera Measures Light
Before your camera can set a correct exposure, it has…
Exposure Bracketing Explained: How to Capture Perfect Exposures Every Time
Have you ever photographed a sunset where the sky glows…