Great food photography makes people hungry. Whether you are shooting for a restaurant menu, a food blog, or your own social feed, the goal is the same: make the dish look fresh, vibrant, and delicious — not flat and unappetizing. The good news is that you don’t need a studio. Most of the best food photos are shot with window light, a modest lens, and a few styling tricks. Here is the complete workflow, from lighting to the final edit.

Light Is Everything: Use Soft Window Light
Light is the single biggest factor separating a “phone snapshot” from a “menu photo.” Harsh light creates deep shadows and blown highlights that make food look dry and unappealing; soft, diffused light does the opposite. The easiest source is a large window. Place your dish on a table beside it and let the light fall across the food at an angle — from the side or slightly behind — rather than straight on.
If the sunlight is too strong, soften it with a sheer white curtain or a sheet of tracing paper held between the window and the plate. On the shadow side, bounce light back with a piece of white foam board or a simple reflector to fill the dark areas. This side-light-plus-fill setup is the classic food photography recipe, and it costs almost nothing.

Camera Settings That Keep Food Sharp and Clean
Food is shot close up, so depth of field is your first decision. Shoot in Aperture Priority and choose an aperture around f/4 to f/5.6 for a single dish — wide enough to blur a busy background, narrow enough to keep the key part of the food sharp. For overhead flat lays where the whole scene should stay sharp, stop down to f/8.
Set your ISO as low as the light allows (100–400) to keep noise out of smooth surfaces like sauces and eggs, and keep the shutter speed at 1/100 s or faster if you are hand-holding — or use a tripod and remote shutter so you can shoot slower without shake. Set white balance manually rather than trusting auto: food photos are easily ruined by a color cast that turns white plates blue or cream soup orange. A grey card or a custom WB preset fixes this before you even press the shutter.
Choosing the Right Lens
You don’t need exotic glass. A 50mm f/1.8 prime on a full-frame body (or a 35mm on APS-C) is the food photographer’s workhorse — it has a natural perspective and lets in plenty of light. A 100mm macro lens is the upgrade that unlocks tight detail shots of texture, crumbs, and steam, and it compresses the background into a smooth blur. Whatever lens you mount on a Canon, Nikon, or Sony body, avoid ultra-wide focal lengths: they distort plates and make food look strange from up close.
Styling: Props, Backgrounds, and the Details That Sell
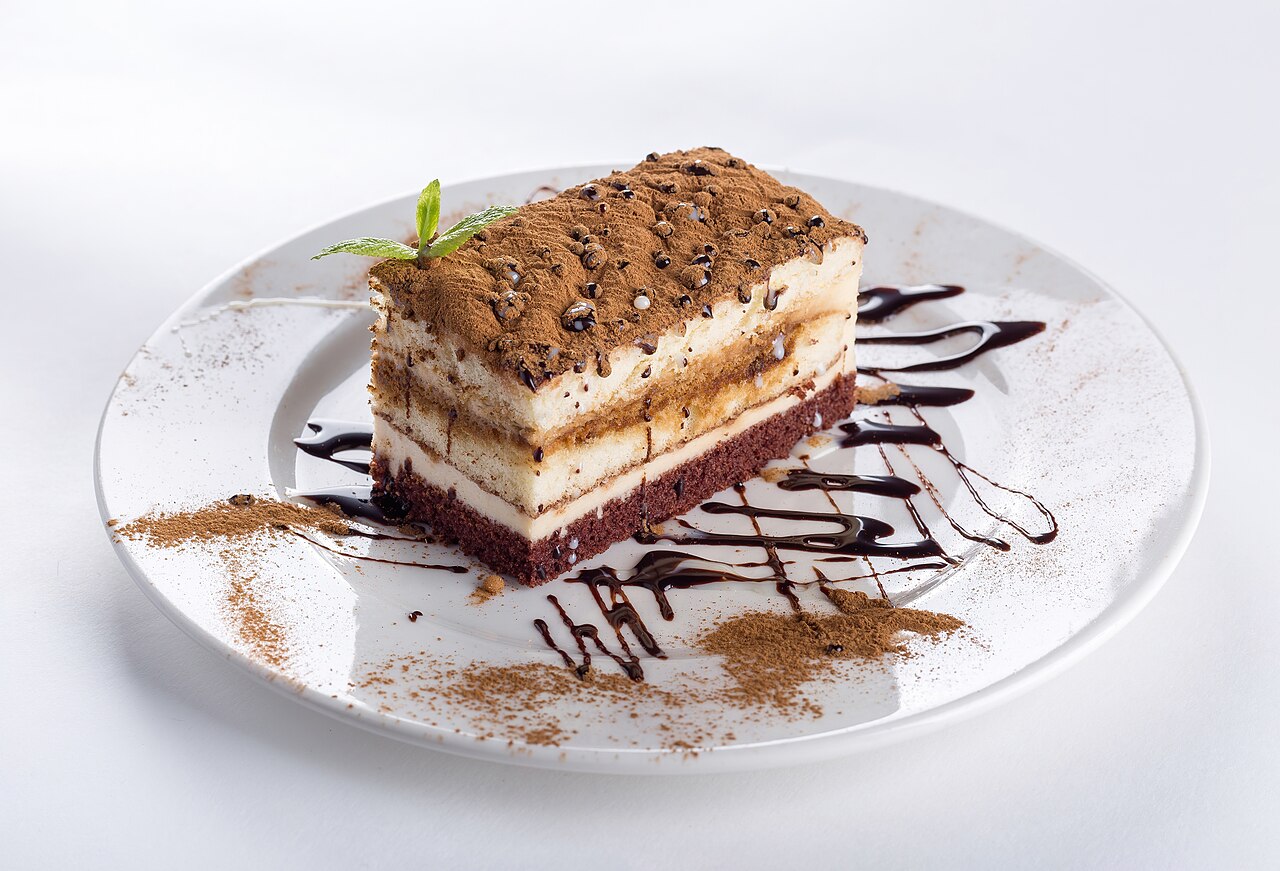
Styling is half the shot. Use neutral, matte surfaces — wood boards, slate, linen napkins, or plain white plates — so the food is the hero. Add a few intentional props (a fork, a crumpled napkin, a scattering of herbs or crumbs) to tell a story, but keep the scene uncluttered. Garnish and texture matter: a fresh sprig of herbs, a drizzle of sauce, or a light oiling of greens makes food look alive instead of tired.
Shoot quickly once the food is plated. Vegetables wilt, sauces congeal, and ice cream melts within minutes, so have your composition and settings ready before the dish arrives.
Angles That Make Food Look Delicious
Three angles cover most food photography. The 45-degree angle — the view you would naturally have sitting at the table — works for dishes with height like burgers, stacks, and bowls. The overhead flat lay, straight down from above, suits flat scenes such as pizzas, tablescapes, and multiple small dishes. The straight-on (90-degree) shot highlights layers, like the cross-section of a cake or a stacked sandwich. Match the angle to the dish’s strongest feature, and keep the camera parallel to the table to avoid a distracting perspective lean.
Shooting Food with Your Smartphone
Modern phone cameras — with fast computational processing and built-in portrait mode — are fully capable of restaurant-quality food photos. The same rules apply: find window light, tap to focus on the hero ingredient, and lock the exposure by sliding down slightly if the scene is too bright. Use the phone’s portrait mode or a 2x/3x telephoto lens for a shallow-depth look, and avoid the ultra-wide lens, which distorts plates up close.
Editing Food Photos: Less Is More
In editing, your targets are accurate white balance, gentle contrast, and a slight saturation lift. Correct the white balance first so whites are truly white, lift the shadows a touch to bring out detail, and add a little warmth or vibrance — but resist the urge to oversaturate. Food should look appetizing and natural, not radioactive. A subtle vignette can also pull the eye toward the plate.
Conclusion
Food photography comes down to three controllable things: soft light, a shallow-but-not-too-shallow aperture, and a clean, intentional scene. Master those with a window, a 50mm prime, and a piece of foam board, and you will be producing mouth-watering images with gear you already own. The rest — garnish, angles, and a light touch in editing — is practice that quickly becomes instinct.
FAQ
What aperture is best for food photography?
Around f/4 to f/5.6 for a single dish — enough depth of field, with a soft background. Use f/8 for overhead flat lays where you want the whole scene sharp.
Do I need a macro lens for food photography?
No. A 50mm f/1.8 or a 35mm prime handles most food shots beautifully. A 100mm macro is a nice upgrade for extreme close-ups of texture and detail.
Why do my food photos look yellow or blue?
It is a white balance issue caused by mixed or artificial light. Set a manual white balance, use a grey card, or correct the color cast in editing before anything else.
Is natural light or flash better for food?
Natural window light is the easiest and most flattering for beginners. If you add flash, diffuse it heavily with a softbox or bounce and keep it off-camera to avoid harsh, flat lighting.
Related Posts
The 180-Degree Shutter Rule: What It Is and How to Use It
Switch your camera into video mode and you may notice…
RAW vs JPEG: Why Photographers Shoot RAW (and When JPEG Still Wins)
A photographer shooting in the field — RAW preserves every…
Focus Stacking Explained: How to Get Everything Sharp from Front to Back
Try to photograph a flower, an insect, or a piece…