Double exposure photography blends two separate images into a single frame, letting a portrait dissolve into a forest, a skyline merge with a face, or a flower layer over a silhouette. The technique dates back to the film era, when photographers would rewind the film slightly and shoot a second image over the first — sometimes by accident. Today, nearly every modern mirrorless and DSLR camera can do it digitally, and editing software offers even more control.
What Is Double Exposure Photography?
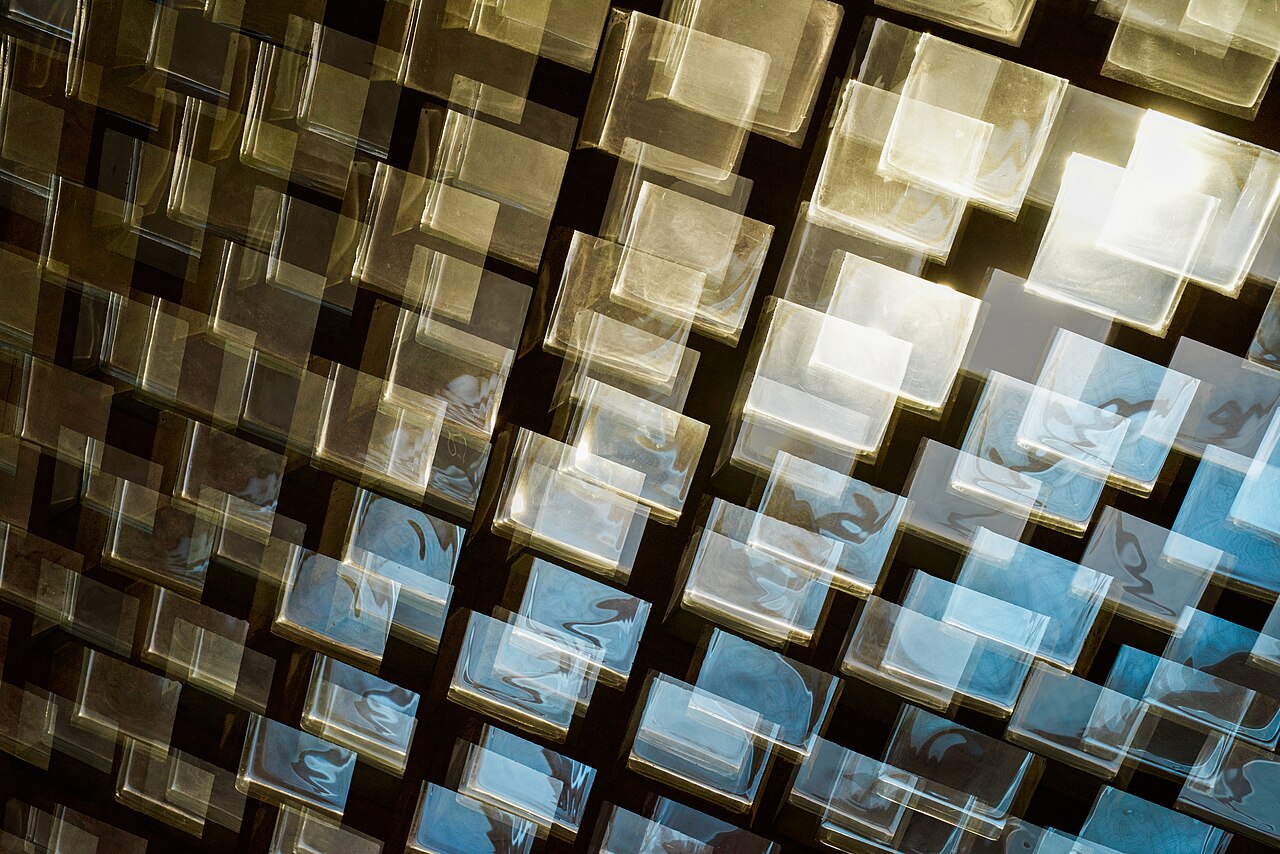
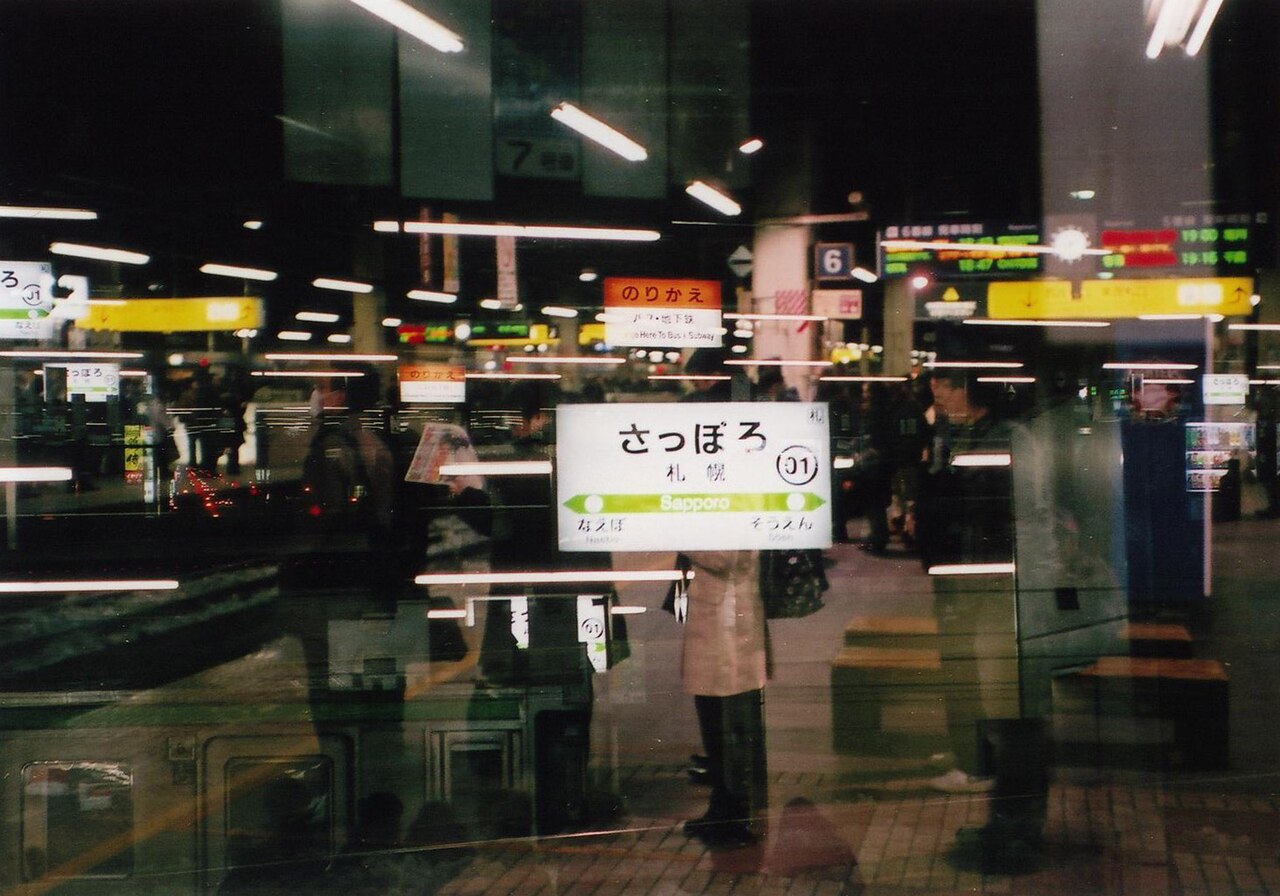
A double exposure is exactly what it sounds like: two exposures combined into one image. In the days of film, this meant exposing the same frame of film twice. The result is that the bright areas of one image show through the darker areas of the other, creating a ghostly, layered look.
The magic of the technique comes from how light adds up. Dark or black areas of the first image contribute almost nothing, so whatever you shoot second fills those shadows. Bright areas, in contrast, are already used up and tend to block the second image. This is why the classic double-exposure recipe is a silhouette against a bright background: the silhouette stays dark, and your second shot — texture, trees, or city lights — fills it. A multiple exposure is the same idea taken further, with three, five, or even ten frames layered together.
How to Shoot a Double Exposure In-Camera
Most interchangeable-lens cameras from Canon, Nikon, Fujifilm, Sony, and Panasonic include a multiple-exposure mode, usually found in the shooting or drive menu. Canon and Nikon label it “Multiple Exposure,” while Fujifilm lists it in the drive settings. The exact steps vary by model, but the general workflow is the same:
- Enable the mode and choose the number of exposures (2, 3, or more).
- Choose a blend mode. Most cameras offer Additive (brightness is added — the classic film look), Average (brightness is averaged to control highlights), and Bright/Dark (only the brighter or darker pixels of each frame are kept).
- Shoot the first frame — typically a clean silhouette or a strong, simple subject.
- Shoot the second frame — a texture, pattern, landscape, or cityscape to fill the dark areas.
- Review the result and, if the camera allows, re-shoot the last frame until the blend works.
Some cameras also let you start from an existing photo on the memory card rather than shooting both frames live, which is handy when you want to plan the silhouette and texture separately.
In-Camera vs. Photoshop: Which Should You Use?
Doing it in-camera is fast, fun, and forces you to think about the result in the moment. But post-processing gives you far more control, and it is the better choice when precision matters.
| Factor | In-camera | Photoshop / Lightroom |
|---|---|---|
| Speed | Instant preview, no software needed | More setup, but repeatable |
| Blend modes | A handful (additive, average, bright/dark) | Full control (Screen, Multiply, Lighten, Darken, opacity masks) |
| Flexibility | Limited; can’t reposition layers after shooting | Resize, move, and mask each layer independently |
| Output | A single merged image | Full-resolution, editable layered file |
The Photoshop workflow is straightforward: open your base image, drop the second image onto a layer above it, and change the top layer’s blend mode to Screen (the digital equivalent of additive) or Lighten. Add a layer mask to paint the second image in or out of specific areas — something an in-camera double exposure cannot do.
6 Tips for Better Double Exposures
- Shoot the silhouette first. A clean, dark subject against a bright background gives the second image a clearly defined canvas to fill.
- Keep the base image simple. Busy backgrounds compete with the layered image; negative space is your friend.
- Use high-contrast textures for the second shot — tree branches, leaves, city lights, water ripples, or clouds.
- Mind the highlights. In additive mode, bright-on-bright blows out quickly. Underexpose slightly or use Average mode.
- Shoot RAW when you can. Even if the camera merges in-camera, RAW preserves the most detail for later tweaks.
- Practice the pairing. Portrait + nature, architecture + sky, and body + texture are reliable combinations to start with.
Creative Ideas to Try
- Portrait + forest or tree branches (the most iconic double exposure)
- Face + city skyline or architecture
- Hands or body + flower petals or water texture
- Horizon landscape + clouds layered over mountains
- Studio silhouette + abstract bokeh or light trails
Conclusion
Double exposure is a forgiving, endlessly creative technique that works as well in a modern mirrorless camera as it did in a 1910s darkroom. Start with a simple silhouette and a textured second frame, experiment with the blend modes, and move to Photoshop when you want fine control. It is one of the fastest ways to make a photograph feel like a painting.
FAQ
Can any camera do double exposure?
Most modern mirrorless and DSLR cameras from the major brands include a multiple-exposure mode, but many entry-level compacts and phone cameras do not. If your camera lacks the feature, you can still combine images in free software like GIMP or mobile apps like Snapseed.
What’s the difference between double exposure and multiple exposure?
A double exposure combines exactly two frames, while a multiple exposure combines three or more. The technique is identical; only the number of layers changes.
Can I shoot a double exposure in RAW?
It depends on the camera. Many models record a merged JPEG when using the multiple-exposure feature, while some let you keep the individual RAW files or produce a RAW composite. If you want full RAW flexibility, shoot the two frames separately and blend them in post.
Related Posts
Product Photography: A Complete Guide to Sharp, Sales-Ready Shots
A product photo is often the first — and sometimes…
Exposure Modes Explained: P, A (Av), S (Tv), and M — When to Use Each
Look at the top of any modern camera and you'll…
Food Photography: A Complete Guide to Mouth-Watering Shots
Great food photography makes people hungry. Whether you are shooting…