There is a short window twice a day when the sky turns a deep, saturated blue and city lights begin to glow against it. Photographers call it the blue hour, and it produces some of the most atmospheric twilight images you will ever take. It needs no special gear beyond a tripod and a little patience. This guide explains what blue hour is, when it happens, and the exact camera settings and techniques to capture it well.
What Is Blue Hour?
Blue hour is the period of twilight — shortly before sunrise in the morning and shortly after sunset in the evening — when the Sun sits below the horizon and the sky glows a deep blue. It is usually said to occur when the Sun is between roughly 4° and 8° below the horizon, though many photographers and apps treat the sweet spot as about 4° to 6°. Depending on your latitude and the season, the effect can last anywhere from around 20 minutes to more than 90 minutes.
The blue color is real physics, not just a poetic name. After the Sun has set, its direct light no longer reaches your scene, but sunlight still passes through the upper atmosphere. Shorter blue wavelengths are scattered by air molecules (a process called Rayleigh scattering) and bent down toward the ground, while longer red wavelengths pass straight through into space. Ozone high in the atmosphere also absorbs a specific band of orange-red light through a process called Chappuis absorption, deepening the blue. The result is a soft, even, cool-toned light that fills the sky just before it fades into night.
Why Photographers Love Blue Hour
Three reasons make blue hour a favorite. First, the light is soft and even — there are no harsh shadows or blown highlights because the Sun itself is below the horizon and the whole sky acts like a giant diffuser. Second, the deep-blue sky provides a natural color contrast that makes warm artificial lights — streetlamps, windows, car trails — pop. That blue-and-amber pairing is the signature look of a great twilight cityscape. Third, because the sky and the ground are much closer in brightness than they are at midday or even at golden hour, your camera can often capture the full scene in a single exposure without clipping.
When Does Blue Hour Happen?
Blue hour happens twice a day, mirroring the golden hour. In the evening it begins right after sunset, and in the morning it ends just before sunrise. Because the Sun’s path below the horizon is steep near the equator and shallow near the poles, blue hour is shorter in the tropics and longer at high latitudes — in the far north or south during summer it can stretch for hours.
The easiest way to nail the timing is an app. PhotoPills, The Photographer’s Ephemeris, and many free sunset calculators give exact blue-hour start and end times for any location and date. Arrive about 30 minutes before the listed start time so you are set up and composed before the color peaks.
Camera Settings for Blue Hour
Because the light is dim, you will almost always shoot from a tripod at a slow shutter speed. Start here:
- Exposure mode: Manual gives the most control, but Aperture Priority with a low ISO also works well.
- ISO: Start at 100 or 200 to keep the image clean. Since you are on a tripod, you rarely need high ISO.
- Aperture: f/8 to f/11 is a good default — it keeps the whole scene sharp and gives a pleasing starburst on point light sources. Open up to f/4 or f/5.6 if you want a shallow depth of field on a close subject.
- Shutter speed: This will range from about 1 second to 30 seconds depending on the light and how much you want moving water or clouds to blur. Use a 2-second timer or a remote release to avoid shake from pressing the button.
- White balance: Auto white balance often neutralizes the blue you are trying to capture. Set it manually — a “shade” or “tungsten” preset, or a value around 4000–6500 K — and shoot RAW so you can fine-tune it later.
- Focus: Autofocus can hunt in dim light. Switch to manual focus and magnify a distant light or edge to confirm sharpness, or autofocus on a bright light first and then switch the lens to manual to lock it.
Gear You Need
Blue hour is one of the cheapest genres to try. The essentials are a camera with full manual controls, a sturdy tripod, and a remote shutter release or the built-in timer. A wide-angle or standard zoom (roughly 16–35 mm on full frame) suits skylines and landscapes, while a longer lens can compress distant landmarks.
Any modern interchangeable-lens camera does the job, but full-frame bodies from Sony, Canon, and Nikon are popular because their larger sensors keep long exposures clean at base ISO. A lens hood helps too — streetlights just outside the frame can throw flare across your image.

Composition and Subject Tips
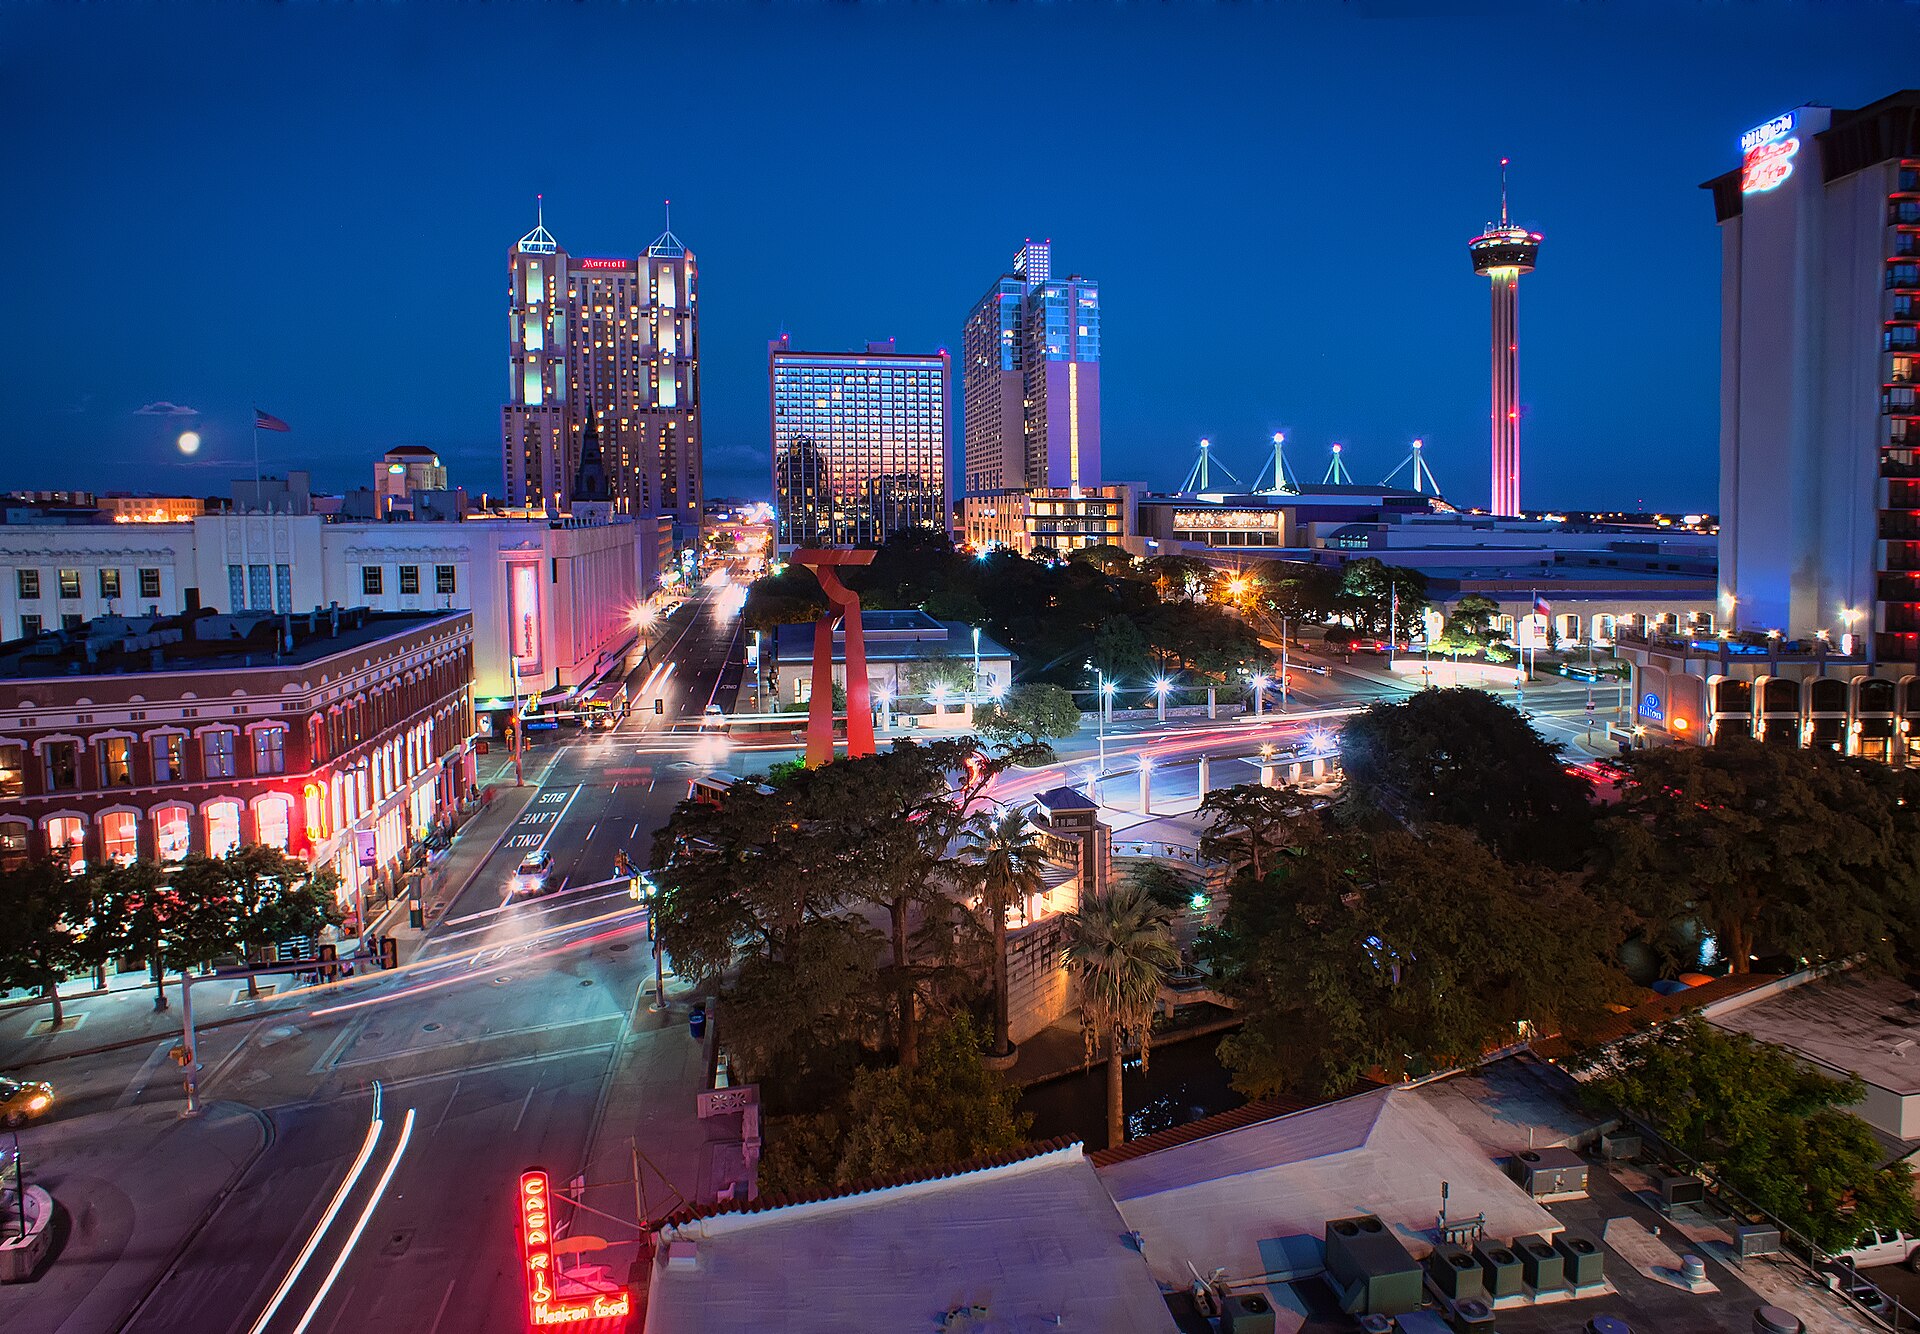
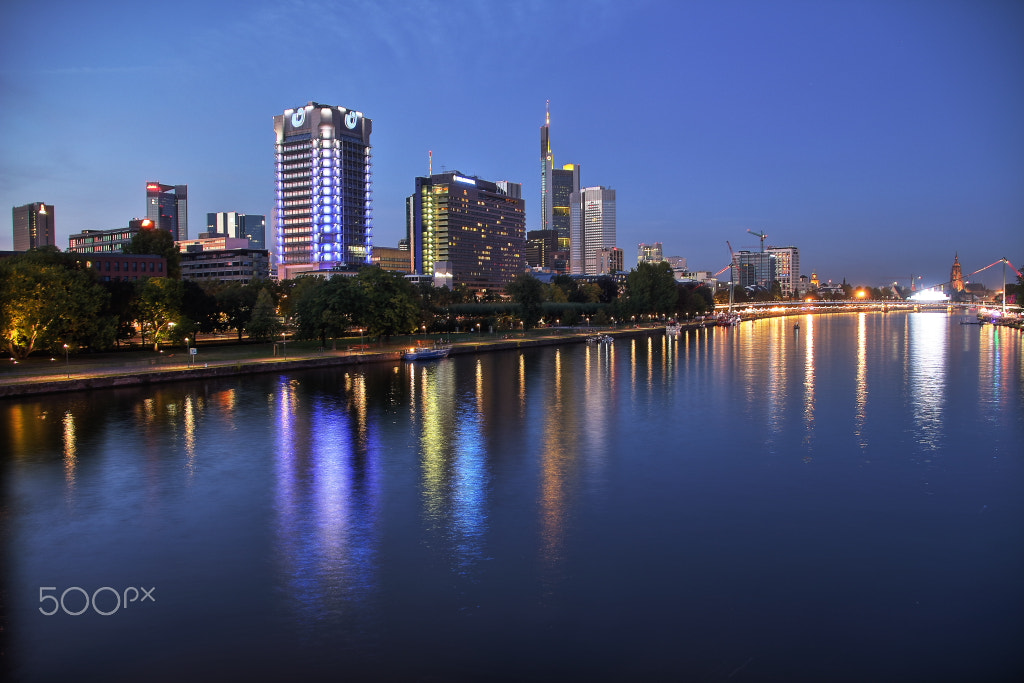
Blue hour rewards a little planning. City skylines, harbors, bridges, and reflections are classic subjects because their warm lights contrast against the cool sky. Look for water — a river, lake, or even a wet street doubles every light and adds depth. Arrive early enough to test compositions in fading daylight, then wait for the sky and the artificial lights to reach a balance: shoot too early and the sky is still pale, too late and it turns black.
Silhouettes also work beautifully during blue hour. A clean, recognizable shape — a tree line, a building profile, a person on a pier — against the glowing blue sky reads instantly. Include a light source or two in the frame to anchor the scene and give the eye somewhere to land.

Common Mistakes to Avoid
- Waiting too long. The window is short, and once the sky goes black you have missed it. Set up before, shoot through, and stop when the color is gone.
- Underexposing the sky. Your meter can be fooled by bright lights; check the histogram and push exposure until the blue sky holds detail without clipping the lights.
- Leaving auto white balance on. It will strip out exactly the blue you came for.
- Shooting handheld. At these shutter speeds, even great stabilization will not save a 10-second exposure. Use the tripod.
Conclusion
Blue hour is a short, predictable, and forgiving window that produces some of the most atmospheric images in photography. Master the timing, lock in the right settings, and let the deep-blue sky do the rest. Get out a little before sunset tomorrow and try it for yourself.
FAQ
What time is blue hour?
It varies by location and season. It occurs shortly after sunset and shortly before sunrise, when the Sun is roughly 4° to 8° below the horizon. Use PhotoPills or a sunset calculator to get exact times.
How long does blue hour last?
Anywhere from about 20 minutes to over 90 minutes, depending on latitude and season. It is shorter near the equator and longer at higher latitudes.
What is the difference between blue hour and golden hour?
Golden hour happens when the Sun is just above the horizon and produces warm, low-angled sunlight. Blue hour comes after sunset (or before sunrise) when the Sun is below the horizon and the light is soft, cool, and blue.
Do I need a tripod for blue hour photography?
Yes, almost always. The slow shutter speeds required in dim twilight make a tripod the single most important piece of gear.
Related Posts
Fireworks Photography: Camera Settings and Tips for Perfect Bursts
Fireworks are one of the easiest “wow” subjects in photography…
How to Photograph Birds in Flight: Camera Settings, Autofocus, and Technique
Photographing birds in flight is one of the most rewarding…
RAW vs JPEG: Why Photographers Shoot RAW (and When JPEG Still Wins)
A photographer shooting in the field — RAW preserves every…